
I’ve been holding off on posting this, even though I’ve had my cloth diapers for months now, just because I wanted to try them out before sharing information about them. My sister used cloth diapers for my niece, and she did a bunch of research on the topic which made my choice to cloth diaper simple. Here’s the few reasons I chose to go this route:
- Costs – just google cloth diaper costs versus disposables and you’ll find a bunch of webpages that all say the same thing: cloth diapering is way cheaper. We hope to have more than just one little one, so there’s an added benefit of reusing the cloth diapers for all your children {multiply the savings.}
 {source http://www.squawkfox.com/2012/07/09/cloth-diapers/}
- Environment – this is pretty self-explanatory. Less disposables equals less trash. Makes me feel better not throwing away a bajillion diapers
- Comfort – if it were me, I wouldn’t want to wear a scratchy, tough, paper diaper. I’d much prefer soft fabric. I’m guessing the little one feels the same.
- Style – I mean, come on. The cloth diapers they have out now are ah-dorable. She looks darling in all the different bright colors. {I’m a sucker for bright, bold colors.}

- Safety – the disposables have chemicals, dyes, and other materials {that moisture-stopping gel stuff?!} in them that I really don’t know much about. Less toxins on my baby’s bum makes for a happy momma.
- Ease – in some ways cloth diapering is actually easier than disposables. Eugene & I will use disposables on occasion, mainly when we travel or have someone else watching her {church nursery}, but other than keeping a package on hand, we don’t have to worry about running to the store at 3:00 am because we ran out of diapers. We have our stash of cloth diapers and we won’t need to buy more. While we have more laundry to do, we have less trash to take out. {And I actually don’t hate doing laundry.} Plus, now that cloth diapers have evolved since our parents’ time, there’s no pins or multiple steps to put your baby in a cloth diapers. Just snap or Velcro and you’re on your way.
- Potty training – there’s quite a bit of research out there that says parents have a much easier time potty training their wee ones if they go the cloth diaper route. Babies can feel the wetness with a cloth diaper, whereas the disposables pull moisture from the babies skin so there’s very little wet sensation. I can attest to this already; my little one lets me know as soon as she has a wet diaper. I like that because it keeps her fresh & clean. ;) Oh, and she hasn’t had diaper rash since we started using the cloth diapers.
Alright, so those are my reasons, now on for the nitty-gritty. I ordered three different diapers, all because I found them discounted. I get emails from zulily.com, babysteals.com, and totsy.com that show daily/weekly deals and every now and then you can find a steal on cloth diapers. Each time I bought the diapers, I got better and better prices. First, I bought 10 bonnibuns diapers {http://www.bonnibuns.com.au/}. The diapers are from Australia {they call them “nappies” – how cute is that!}

These are a bit different than the typical all-in-one {AIO} cloth diaper because their insert is a tri fold and snaps onto the back inside of the diaper, rather than being inserted into a pocket.

I like these. The insert’s thick and absorbent, but I actually like the other types I bought a little better. The little one’s still a little too skinny for these; she’s tinkled on me twice because the leg holes are too big. The shipping was quick, and the quality is great. I got these for about $15 each.
The second type of diapers is Awesome Blossom {http://www.awesomeblossomclothdiapers.com/}. I bought seven of these for just $10 each, and these are the more traditional AIO with microfiber inserts that you stuff into the back of the diaper. These fit our string bean a little better, maybe because of the snap that’s close to the leg hole. Unlike the other diapers, these can be adjusted to be shorter too.
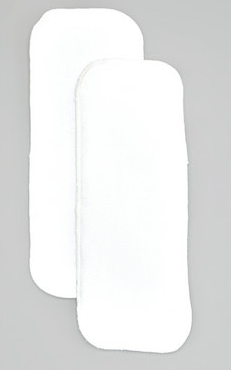
I really like these a lot. They dry much quicker than the bonnibuns, and they’re very absorbent. These aren’t quite as bulky either. Again, they fulfilled my order perfectly and shipping was quick. No complaints here.
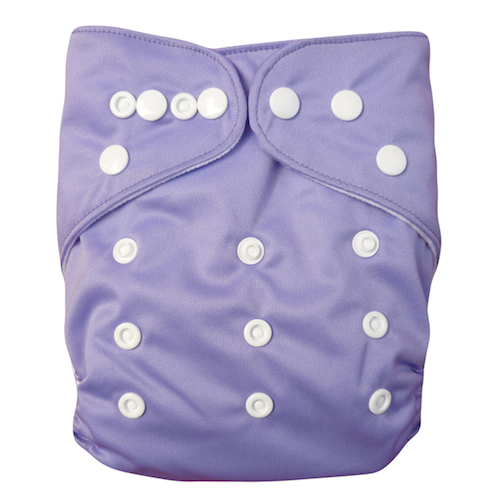
The third type I bought just recently, so I don’t have a review for them yet. They’re from Assunta Store {http://www.assuntastore.com/}. They were the least expensive – just $6.50 each. These are the same style as the Awesome Blossom diapers. If you read the background on this company, you’ll see that they’re based in China and the profits go to a great cause. I’m in. I bought ten one size pocket diapers with microfiber inserts.

They received great reviews on the internet, with the only complaint being the slow shipping {to be expected since it comes from China.} My order was confirmed and completed within hours. I’ll update you on how I like them once I get the chance to test ‘em out.
The other purchase that’s absolutely necessary {in my opinion} is a diaper sprayer. Eugene installed this one:

You use this to spray the “dirty” diapers {not the wet ones}. It’s not nearly as bad as it sounds, just a quick spray so that the mess goes into the toilet and gets a short rinse before going in the hamper.
Right now, we only have 17 diapers and we have to wash them about every other day, sometimes every day with a 7 week old baby. I think when we get the next shipment of 10, we’ll be able to go every other day, possibly every 3 days between washing. I wouldn’t go longer than that anyway because I wouldn’t want the diapers to sit dirty that long.
You can read many different methods for washing, and both types had different recommendations on their website, but what we do right now is to rinse the dirty ones immediately, wash all the diapers {inserts and covers} in warm water with 1/2 to 1/4 of the amount of free & clear detergent, and then we run an extra rinse. We then hang the diapers out to dry on the line outside. It’s been super nice to be able to hang them outside with the Summer weather – cuts the drying time a ton by doing them outside. They recommend not using the dryer because it cuts down on the life of the diapers.

So far, so good! We had to wait until the little one was over 9 lbs. before they fit her, but since then we haven’t gone back! I’ve spent less than $350.00 total on cloth diapering {not including washing machine costs, which are minimal}, and I bet we spent well over $150 on disposables just in the first few weeks before she was big enough to wear cloth. Needless to say, we’re fans of cloth diapering. :)
Oh, and I would be remiss if I didn’t post some pics of the little one modeling her pretty diapers…


Questions? Send ‘em my way. I’m still a cloth diapering rookie, but I’m happy to help if I can!


")
")
")


